Did you know that registration to Fighter Control is completely free and brings you lots of added features? Find out more....

Hobby Boss F-18A 1:48 US Marine Aggressor

An area to show all your in progress models.

Moderator: Flyingmonster

User avatar
steve149c
Posts: 3182
Joined: Mon Oct 05, 2009 7:52 am
Location: Near RAF Valley, Anglesey, N.Wales

Hobby Boss F-18A 1:48 US Marine Aggressor

Post by steve149c » Wed Feb 01, 2012 12:34 pm

Hi All,

I am going to do it in the three tone grey from the US Marines Aggressor squadron.

First up the Kit and sprues

Image

Image

Image

Next a couple of goodies - the Aires F/A-18A Cockpit set (4371) and Eduard Zoom self Adhesive interior PE

Image

Decals from FighterTown decals state side, VFA-125 Rough Raiders (48042) - so I will be doing 320 from VFA-125

http://www.flickr.com/photos/7534470@N08/4183511958/" onclick="window.open(this.href);return false;

Cheers and looking forward to it

Steve
Last edited by steve149c on Wed Feb 01, 2012 12:40 pm, edited 3 times in total.
Amateur modeller
Canon 7D2, 100-400mm IS L lense, Icom R6 and alot of luck!

User avatar
steve149c
Posts: 3182
Joined: Mon Oct 05, 2009 7:52 am
Location: Near RAF Valley, Anglesey, N.Wales

Re: Hobby Boss F-18A 1:48 US Marine Aggressor

Post by steve149c » Wed Feb 01, 2012 12:35 pm

Hi All,

Ive made better progress with her now - after my cockpit problems. Cockpit fitted and main body together - I must admit that I am really enjoying this build.

The instrument panel done with the Eduard prepainted set - and I've very pleased with this.

Image

Image

Also started the sub assembly of air intakes, flaps, wheels etc, will post another update when I can.

Cheers

Steve
Amateur modeller
Canon 7D2, 100-400mm IS L lense, Icom R6 and alot of luck!

User avatar
steve149c
Posts: 3182
Joined: Mon Oct 05, 2009 7:52 am
Location: Near RAF Valley, Anglesey, N.Wales

Re: Hobby Boss F-18A 1:48 US Marine Aggressor

Post by steve149c » Wed Feb 01, 2012 12:37 pm

Hi All,

Starting to understand the Aires Instructions and getting to grips with the sanding, dry fit, resand etc. Its actually very rewarding.

First up - all the joints for the main fuselage have been filled, sand and rescribed. Here they are filled:

Image

Image

Next up was some dry fitting of the engine intakes, again no major problems (Fingers crossed do far)

Image

Image

Then moving back to the pit - the aires section behind the seat is in - but then to make it fit you need to remove a part of the aft section. But then you get left with this gap - ah well, never mind, as I am having the canopy down I will be filling with Squadron green. But just so others are aware!

Image

The pit together and sprayed NATO Black - got the PE parts still to fit, but it is starting to look the part.

Image

Just need to pick out some of the detail now. Other parts in progress are the engine exhausts, ejector seat and canopy drying after a dip in Klear.

Thanks All

Steve
Amateur modeller
Canon 7D2, 100-400mm IS L lense, Icom R6 and alot of luck!

tc2324

Re: Hobby Boss F-18A 1:48 US Marine Aggressor

Post by tc2324 » Wed Feb 01, 2012 1:25 pm

Great start Steve.

The front end of the `pit looks awesome.

:pop:

Flyingmonster
Moderator
Posts: 13588
Joined: Sun Oct 04, 2009 4:16 pm
Location: Skipton, North Yorkshire

Re: Hobby Boss F-18A 1:48 US Marine Aggressor

Post by Flyingmonster » Wed Feb 01, 2012 1:52 pm

The pit looks superb Steve! Lots of pieces in this kit!
Cheers

Boo boo (aka Jamie)

'The first time I ever saw a jet, I shot it down!' - Yeager

User avatar
Ben Montgomery
Moderator
Posts: 8156
Joined: Fri Oct 02, 2009 4:16 pm
Location: Cambridge
Contact:

Re: Hobby Boss F-18A 1:48 US Marine Aggressor

Post by Ben Montgomery » Tue Feb 07, 2012 12:06 am

That cockpit is certainly impressive - looking forward to more! :thumb:

User avatar
steve149c
Posts: 3182
Joined: Mon Oct 05, 2009 7:52 am
Location: Near RAF Valley, Anglesey, N.Wales

Re: Hobby Boss F-18A 1:48 US Marine Aggressor

Post by steve149c » Tue Feb 07, 2012 12:20 pm

Thanks for the kind comments guys - as usual the build is on hold for my two weeks away at sea - running from Immingham to Rotterdam.

But I'm back on the 10th Feb and hope to crack on with it then!! As always, thanks for all the support.

Just hoping the Eagles decide to tank today - clear blue skies I might get to see them!!

Cheers

Steve
Amateur modeller
Canon 7D2, 100-400mm IS L lense, Icom R6 and alot of luck!

User avatar
steve149c
Posts: 3182
Joined: Mon Oct 05, 2009 7:52 am
Location: Near RAF Valley, Anglesey, N.Wales

Re: Hobby Boss F-18A 1:48 US Marine Aggressor

Post by steve149c » Fri Feb 17, 2012 4:09 pm

Hi All,

Back after my two weeks work at sea, got home at 4am this morning and cracked on after a couple of hours sleep.

Firstly I finished off the ejector seat, not exactly sure about the authenticity of the brown leather approach - but I like it. Also a couple of PE parts added (my first experience with PE so its a steep learning curve).

Image

Next I dry brushed the grill/mess behind the seat with Citadel Chainmail to give it some depth.

Image

Filled in that gap behind the canopy with squadron green, and waiting for that to set.

Image

Air intakes - struggled here to get them aligned - it was either a gap at the top, or a gap around the join. I opted for a gap around the rim, so that is next to be filled in once dry.

From the side

Image

From below

Image

As usual - looking forward to comments and advice.
Amateur modeller
Canon 7D2, 100-400mm IS L lense, Icom R6 and alot of luck!

Flyingmonster
Moderator
Posts: 13588
Joined: Sun Oct 04, 2009 4:16 pm
Location: Skipton, North Yorkshire

Re: Hobby Boss F-18A 1:48 US Marine Aggressor

Post by Flyingmonster » Fri Feb 17, 2012 4:26 pm

That Bang Seat looks immense!
Cheers

Boo boo (aka Jamie)

'The first time I ever saw a jet, I shot it down!' - Yeager

User avatar
steve149c
Posts: 3182
Joined: Mon Oct 05, 2009 7:52 am
Location: Near RAF Valley, Anglesey, N.Wales

Re: Hobby Boss F-18A 1:48 US Marine Aggressor

Post by steve149c » Fri Feb 17, 2012 5:39 pm

Thanks Jamie, I can see from the photo that it needs a small touch up!
Amateur modeller
Canon 7D2, 100-400mm IS L lense, Icom R6 and alot of luck!

tanker
Posts: 758
Joined: Mon Oct 05, 2009 5:02 am

Re: Hobby Boss F-18A 1:48 US Marine Aggressor

Post by tanker » Fri Feb 17, 2012 6:11 pm

A fantastic job on cockpit and seat :thumbs: I'm looking for more :pop:

User avatar
steve149c
Posts: 3182
Joined: Mon Oct 05, 2009 7:52 am
Location: Near RAF Valley, Anglesey, N.Wales

Re: Hobby Boss F-18A 1:48 US Marine Aggressor

Post by steve149c » Sun Feb 19, 2012 8:59 am

Hi All,

Just a small update, but it took me the best part of two days. First up the completed pit - PE hud, though the glass looks abit too thick for the scale? The joystick gave me no end of problems, everytime I did the yellow it ran (5 attempts) - red was fine, first time.

So here is is, from the quarter and side on

Image

Image

Next up the PE (Photo Etch) for the internal mirros and handles, this was definately a lesson, learning to coax something into position without getting glue everywhere. Fixed with PVA white glue, just a small amount of yellow to highlight the handles, otherwise unpainted. I didn't bother painting the back of the PE because hopefully it will be under the painted coaming on the canopy (fingers crossed)

Image

Finally canopy masked and glued into place - again PVA white glue with a small bit of filling to do once in position

Image

And just behind the cockpit, I have sanded down the gap, and rescribed, though a quick spray of XF-1 later today may show that I need to redo some of the filling.

Image

Air intakes - well this is another first for me. I popped in Squadron green and then used Cellulose thinners on cotton wool bud sticks and removed the excess, seems to have come up ok. Quick couple of rescribes on the rivets to do.

Image

But all in all she is coming together nicely. Next up is the flaps, wheels bays to protect and then I can start on the camo :-)

Cheers

Steve
Amateur modeller
Canon 7D2, 100-400mm IS L lense, Icom R6 and alot of luck!

Flyingmonster
Moderator
Posts: 13588
Joined: Sun Oct 04, 2009 4:16 pm
Location: Skipton, North Yorkshire

Re: Hobby Boss F-18A 1:48 US Marine Aggressor

Post by Flyingmonster » Sun Feb 19, 2012 1:48 pm

Interesting move with the filler and thinners! Must try that sometime!
Cheers

Boo boo (aka Jamie)

'The first time I ever saw a jet, I shot it down!' - Yeager

User avatar
steve149c
Posts: 3182
Joined: Mon Oct 05, 2009 7:52 am
Location: Near RAF Valley, Anglesey, N.Wales

Re: Hobby Boss F-18A 1:48 US Marine Aggressor

Post by steve149c » Sun Feb 19, 2012 2:34 pm

Thanks Jamie - yes Cellulose thinners will thin Squadron Green (Stinks though!)

Well a small update - thought I'd try out the paints - just the centre line fuel tank for the moment. Don't know why, but Mr Color spits alot, any ideas?

Image

Cheers

Steve
Amateur modeller
Canon 7D2, 100-400mm IS L lense, Icom R6 and alot of luck!

User avatar
steve149c
Posts: 3182
Joined: Mon Oct 05, 2009 7:52 am
Location: Near RAF Valley, Anglesey, N.Wales

Re: Hobby Boss F-18A 1:48 US Marine Aggressor

Post by steve149c » Mon Feb 20, 2012 5:49 pm

Hi All,

Well what a day - I decided as the little ones were in school that I'd crack on with the three tone grey camo - a lesson in itself as I have never done anything so big and complex. The decals only allowed for the early two tone, so several reference photos from the net used, a couple of areas were guessed at.

Overall I am pleased with the outcome. First up the Base layer - I decided on Mr Color 307 neat - went down a treat, all over - great!! Undercarriage bay doors held in place by whitetack - as is the airbrake panel.

Image

Then I masked off the areas to stay light grey, this is where the problems started! Mr Color 317 spit and spat and blocked up the airbrush, no matter what I tried, thinners, reference on internet, nothing. So I gave up and switched to Tamiya XF-53 Neutral Grey, which was a very close match.

The Mr Color 301 Dark grey also spit and spat, so this was swapped out for VAL AIR 71.054 Dark Grey, again a pretty close match. This was my first time with VALAIR, and OMG I am in love, so easy to use, so smooth in application.

Image

Finally the black on the tips of the tail and the top of the wing were done in X-18 Semi Gloss Black. I've still got the nose area to paint, but that is for tomorrow. From start to finish, including masking took about 7 hours. Couple of small areas required touch ups, but overall I am really pleased.

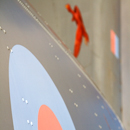
Now hopefully I've got the lines in the right place, as the decals are two different colours to go over the change in camo. Here she is at close of play tonight. Sorry white balance is off on the camera for some reason.

Image

Image

Image

Next up is to seal here with Klear and decal. Sub assembly line of the undercarriage is slowly coming together.

C&C welcome,

Cheers

Steve
Amateur modeller
Canon 7D2, 100-400mm IS L lense, Icom R6 and alot of luck!

tanker
Posts: 758
Joined: Mon Oct 05, 2009 5:02 am

Re: Hobby Boss F-18A 1:48 US Marine Aggressor

Post by tanker » Mon Feb 20, 2012 7:30 pm

great work of paint mask.do you use Tamiya tape?

User avatar
steve149c
Posts: 3182
Joined: Mon Oct 05, 2009 7:52 am
Location: Near RAF Valley, Anglesey, N.Wales

Re: Hobby Boss F-18A 1:48 US Marine Aggressor

Post by steve149c » Mon Feb 20, 2012 7:36 pm

Yes, for this it was 6mm tamiya tape - as I ran out of 20mm. Just be sure to press the edges down to prevent over run.

Thanks for the nice comments too!
Amateur modeller
Canon 7D2, 100-400mm IS L lense, Icom R6 and alot of luck!

User avatar
FTS
Posts: 1587
Joined: Tue Oct 05, 2010 4:49 pm
Contact:

Re: Hobby Boss F-18A 1:48 US Marine Aggressor

Post by FTS » Mon Feb 20, 2012 7:43 pm

That is a fine looking build! Top work :thumb:
http://stevenharrisongreen.wixsite.com/shgp
facebook.com/stevenharrisongreenphotography
instagram.com/shgphotography86/

User avatar
steve149c
Posts: 3182
Joined: Mon Oct 05, 2009 7:52 am
Location: Near RAF Valley, Anglesey, N.Wales

Re: Hobby Boss F-18A 1:48 US Marine Aggressor

Post by steve149c » Tue Feb 21, 2012 6:20 pm

Well another short update of today - been busy with the kids, but always time for a spot of modelling. Alot of time spent patching up the overrun, and then shock horror - I noticed a panel line that wasn't on the model, running right down either side of the spine - so with my heart in my mouth I rescribed, and bingo, perfect!

Ok - the metal just ahead of the thrust can has been painted in silver.

Image

Work on the nose has continued, now the black and cream tip done. The gun muzzle was first sprayed with Citadel Boltgun, and then toned down with Tamiya Smoke X-19 over the top - worked out well I think.

Image

Next the sub assembly continues, aerials are started to be mounted, but this is her at close of play tonight - almost there.

Image

Cheers for now

Steve
Amateur modeller
Canon 7D2, 100-400mm IS L lense, Icom R6 and alot of luck!

Flyingmonster
Moderator
Posts: 13588
Joined: Sun Oct 04, 2009 4:16 pm
Location: Skipton, North Yorkshire

Re: Hobby Boss F-18A 1:48 US Marine Aggressor

Post by Flyingmonster » Tue Feb 21, 2012 8:11 pm

Looks gooood!
Cheers

Boo boo (aka Jamie)

'The first time I ever saw a jet, I shot it down!' - Yeager

Post Reply

Return to “Work In Progress”

Who is online

Users browsing this forum: No registered users and 6 guests